By default, after installing Windows 10, the language used will be English and so it will cause many obstacles for users when they are not good at foreign languages, not to mention the new interface of Windows 10 makes them have to get used to it gradually. Therefore, through this article, Taimienphi will guide you how to convert Vietnamese on Windows 10 or many people still call it Vietnamese installation for Windows 10 so that readers can easily use this new

How to switch Vietnamese on Windows 10
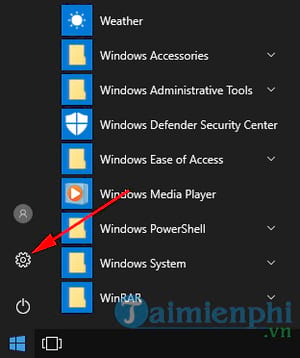
Step 1: From the user interface, click on the Windows icon in the lower left corner of the screen and select the gear icon as shown below.
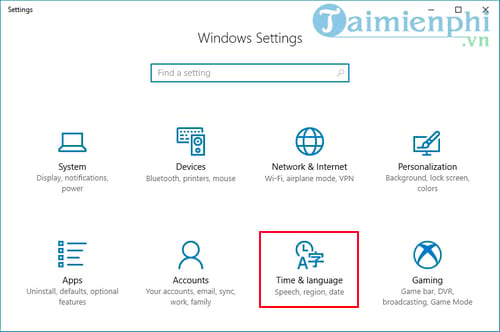
Step 2: The Settings window opens, click Time & Language
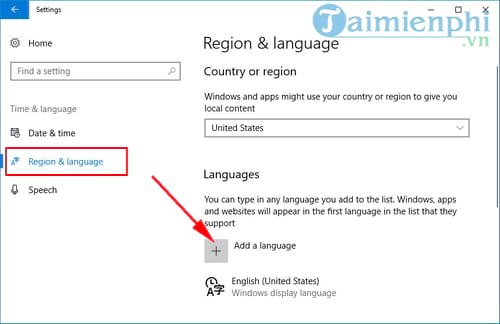
Step 3: In the Time & Language interface, select Region & language in the left column will see that the default language is English (United States). Click Add a language to start adding Vietnamese language packs on Windows 10.
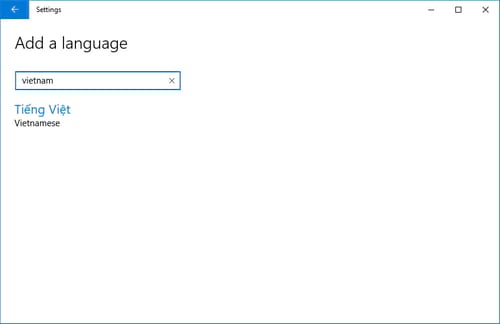
Step 4: Immediately a list of languages that Windows 10 supports will appear
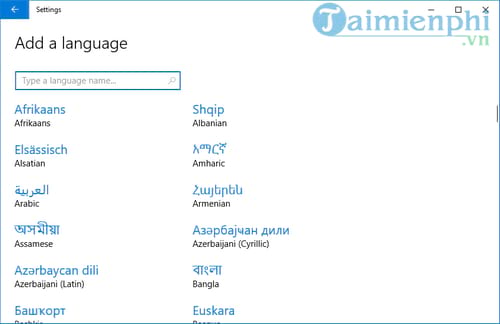
You search or type in the Vietnam keyword search box to add Vietnamese language packs (Vietnamese).
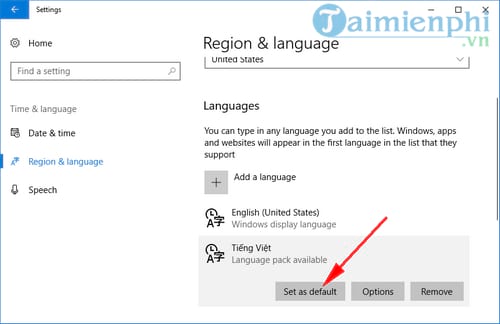
Step 5: After that, the language you select will appear open the Language section, click Set as default to set as default
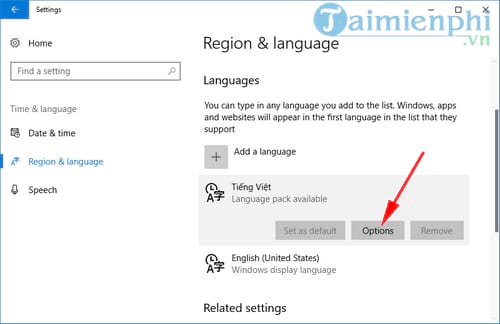
Step 6: Once you have set Vietnamese as the default, you need to download the language pack and install it on your computer by clicking on the Vietnamese language line and selecting Options as shown below.
Step 7: Click Download to automatically download and install the Vietnamese display language set for Windows 10 computer.